|
5/6/2024 0 Comments Metal Etchings for a Mestre
Equipment
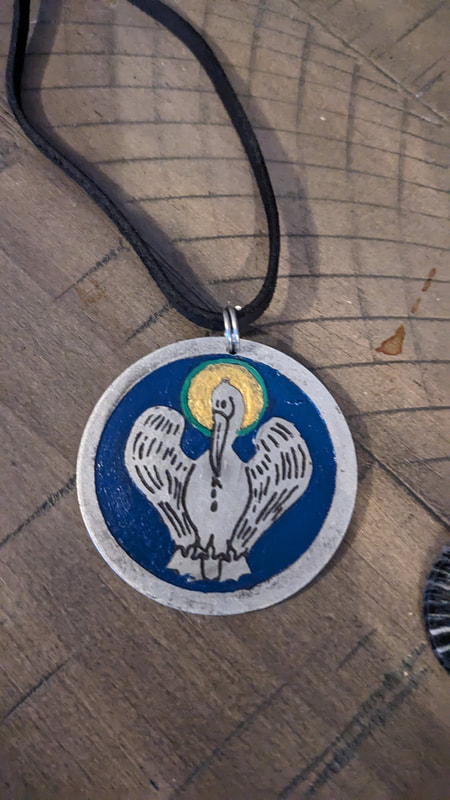
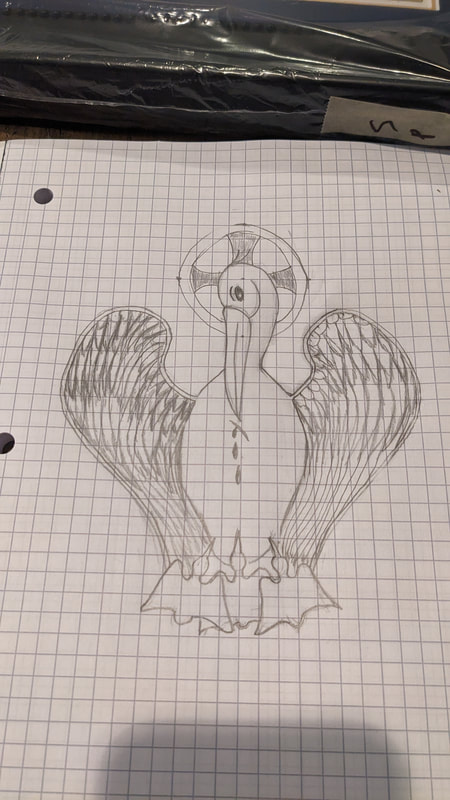
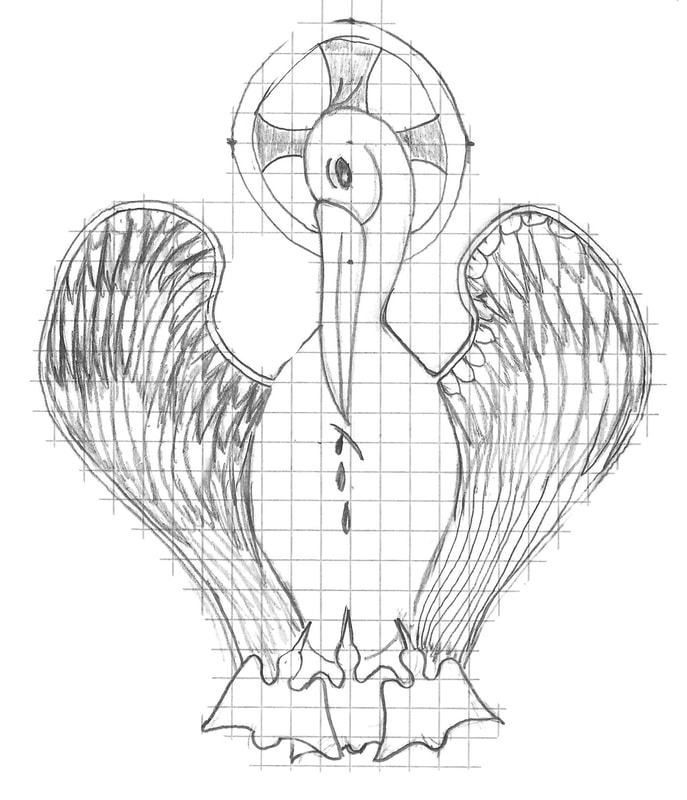
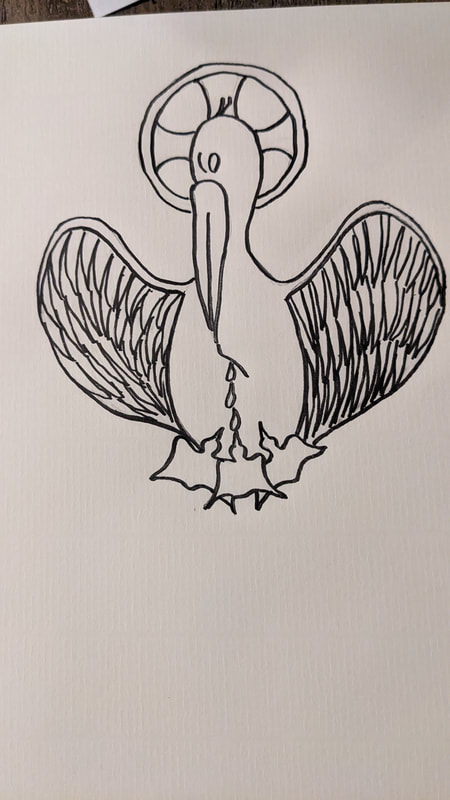
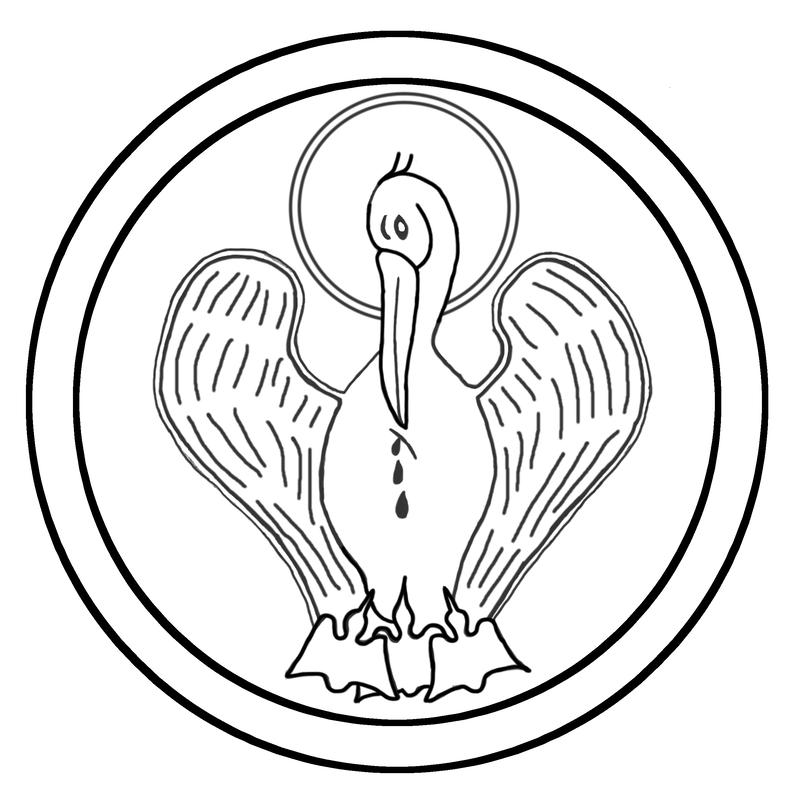
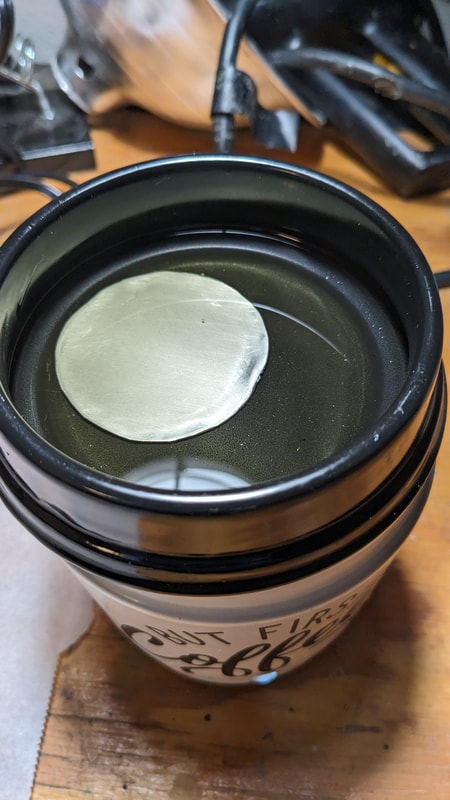
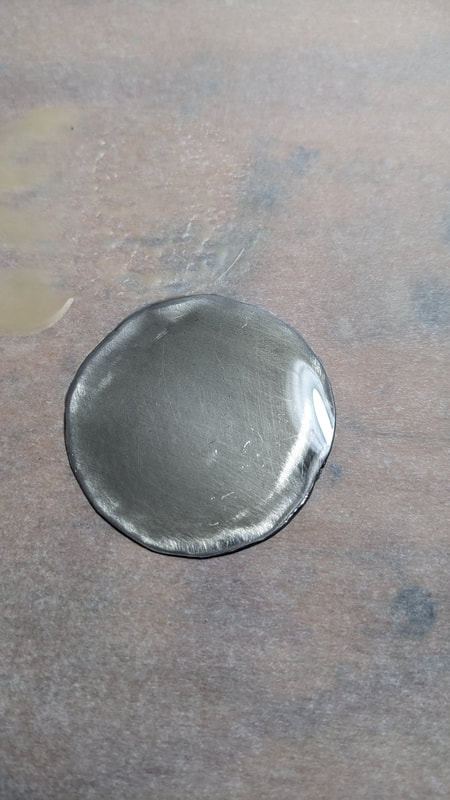
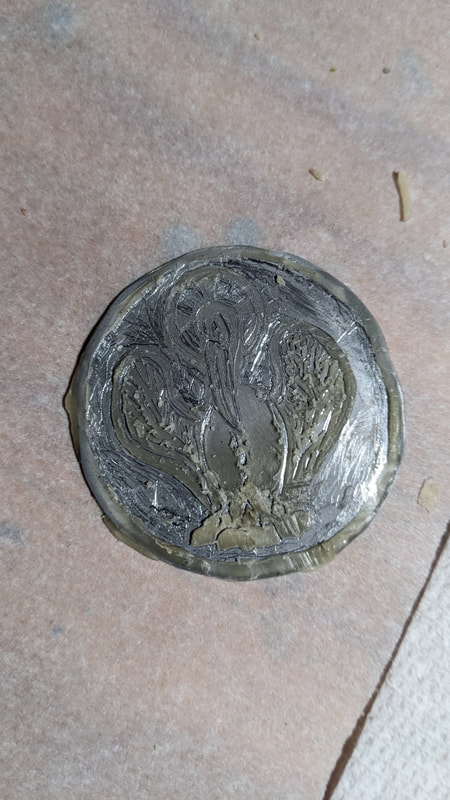
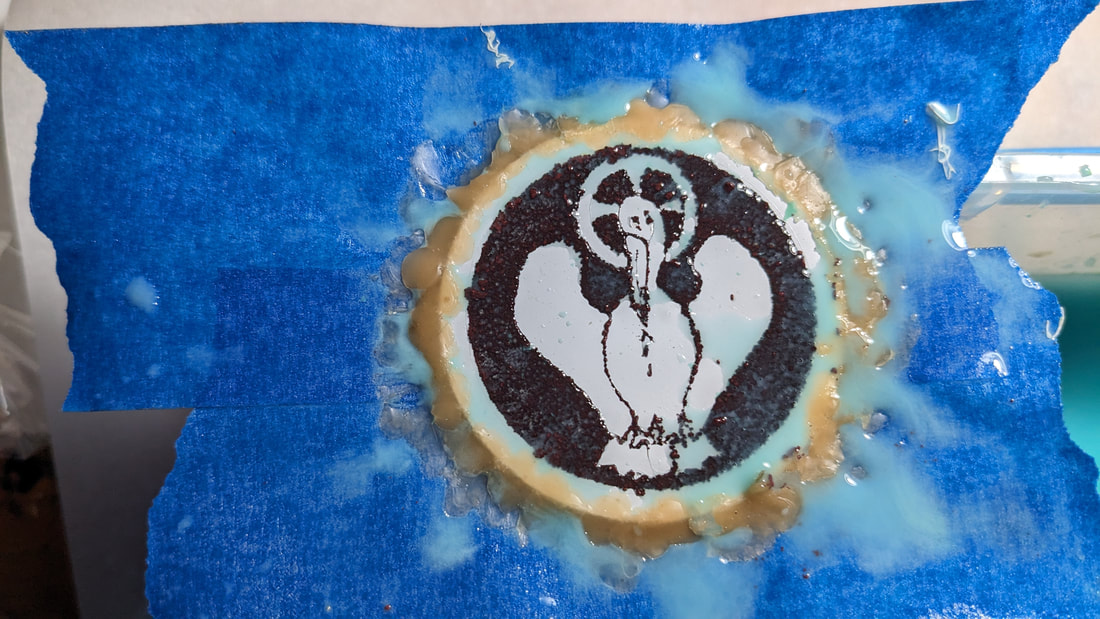
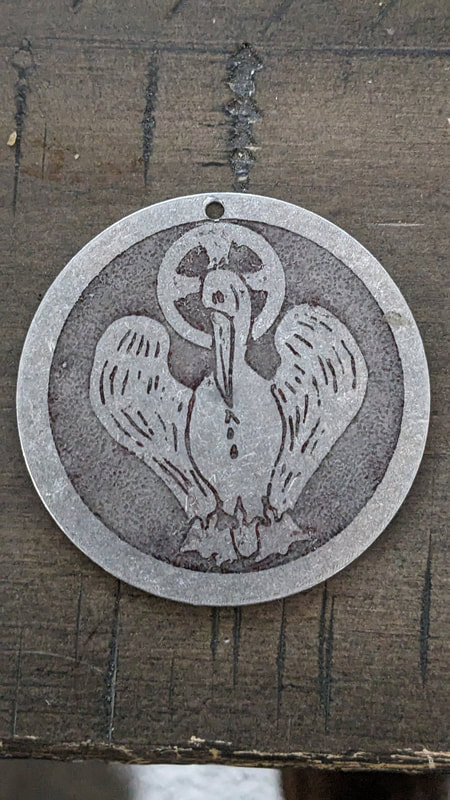
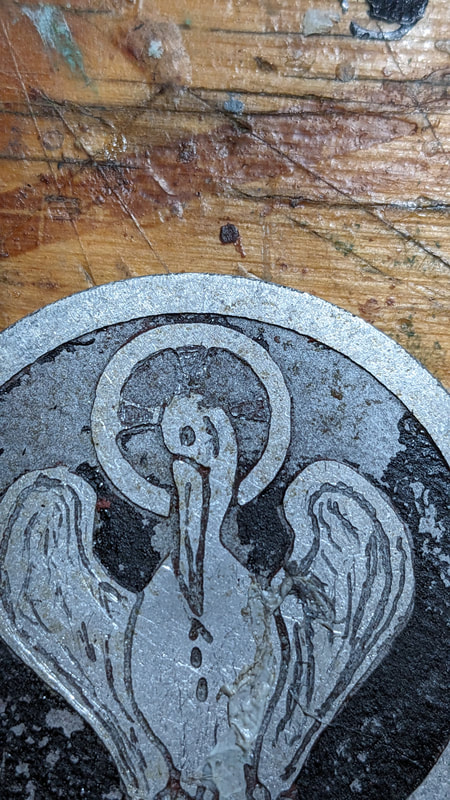
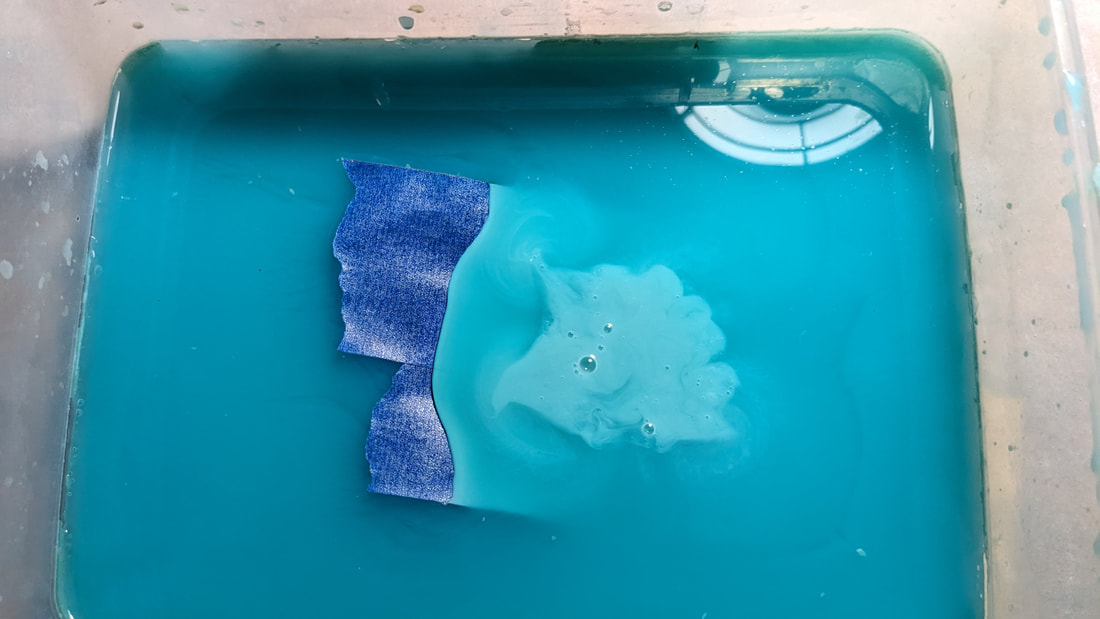
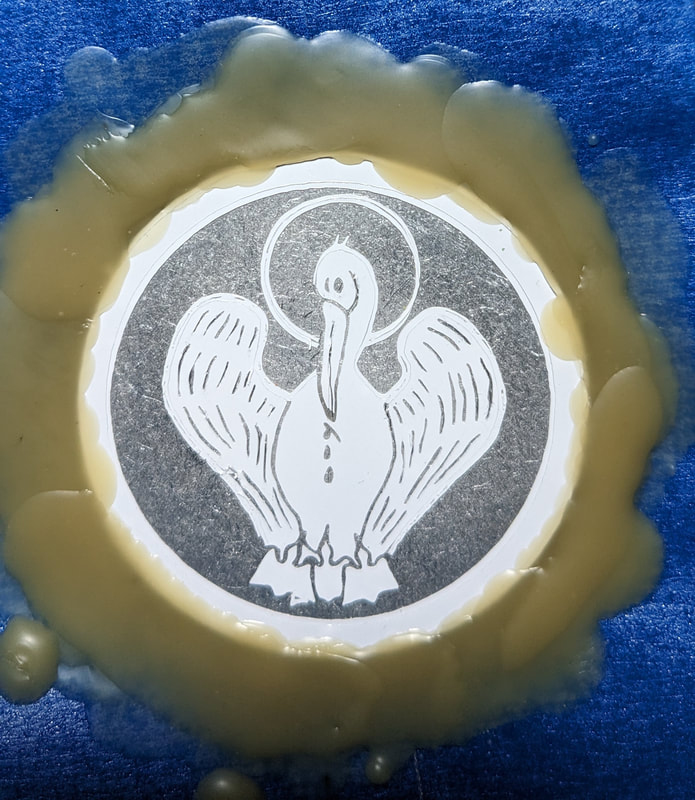
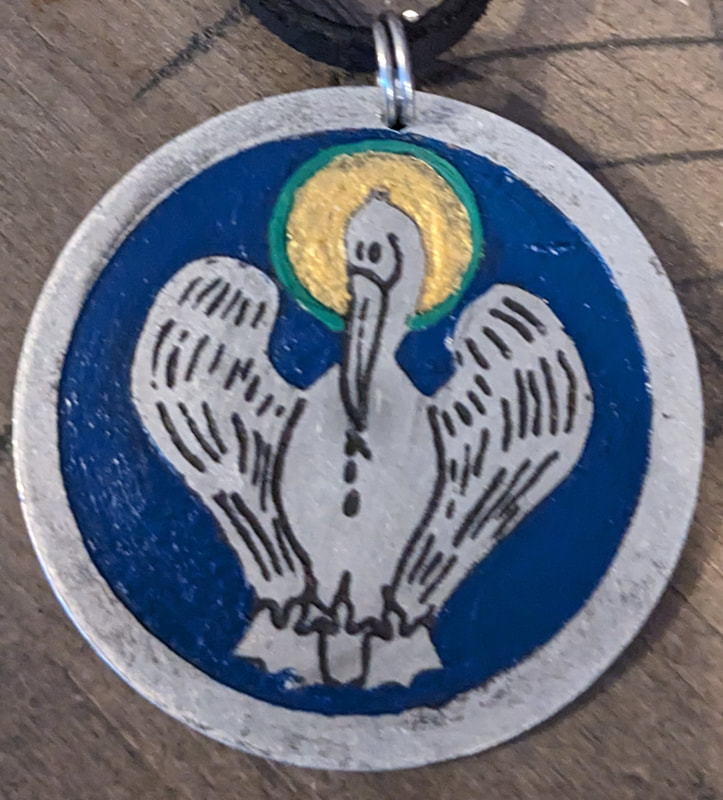
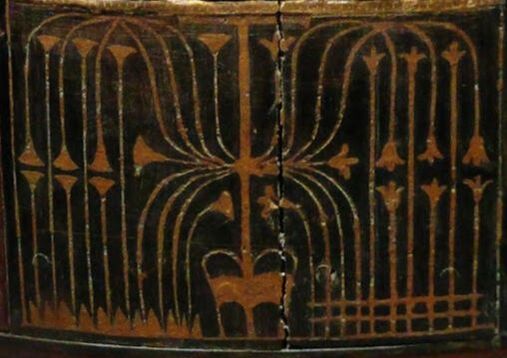
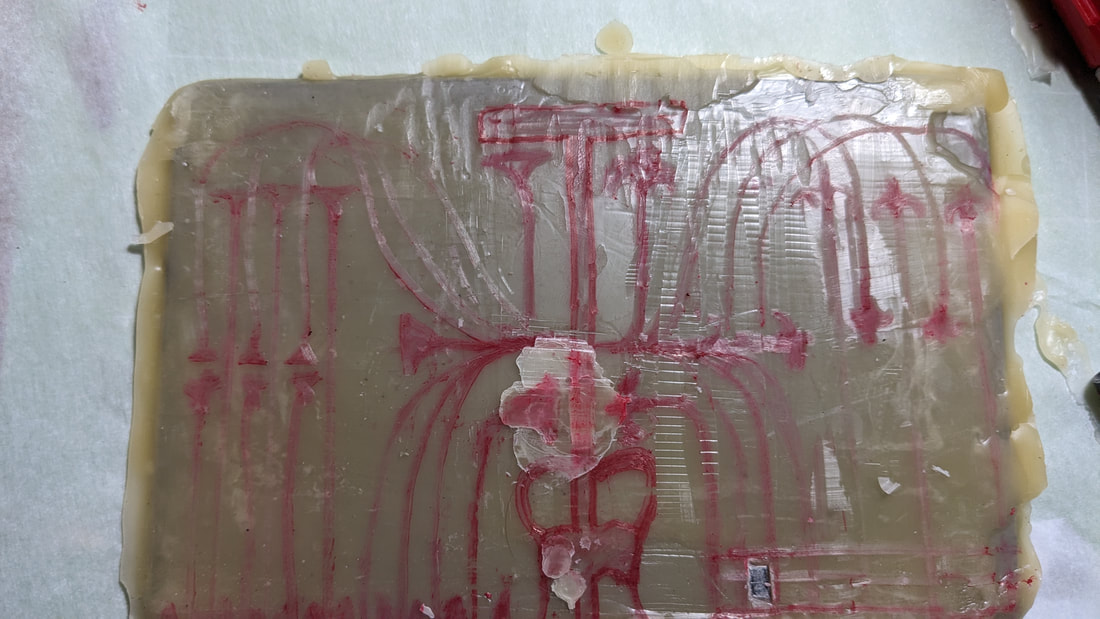
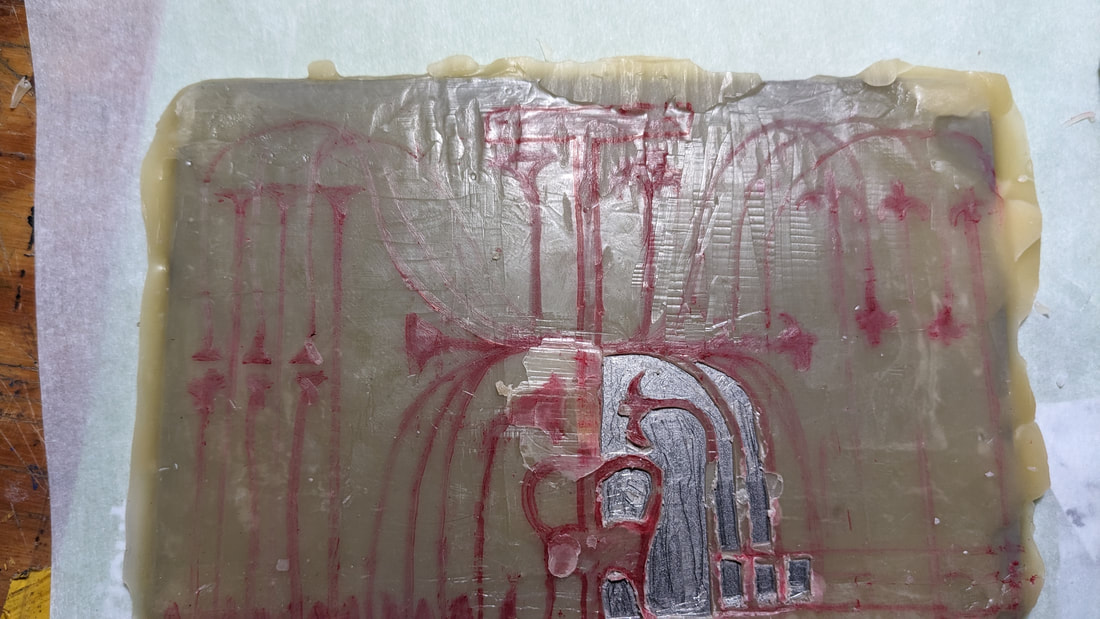
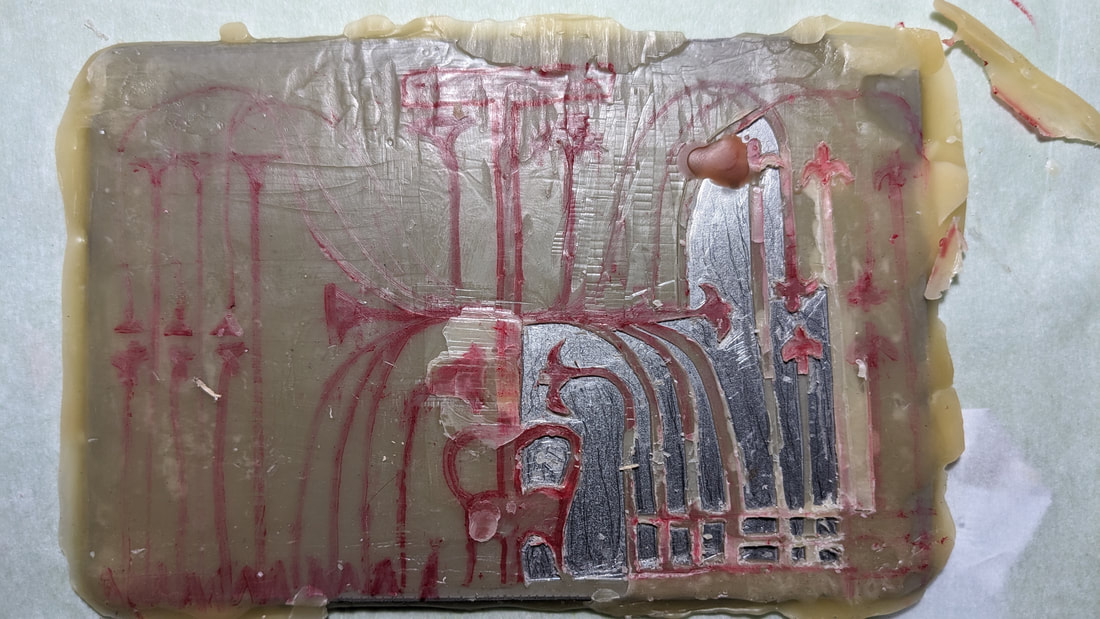
The Process I began the process by drawing the image by hand on a piece of paper. Once I was happy with the overall look, I cleaned the metal disc with isopropyl alcohol, and then hand drew the image again onto the metal disc. NOTE: In the future I will probably try to use a transfer method such as carbon paper or a period technique for consistency. Drawing complete, I set it aside and began to prepare the wax solution. I added the 3 waxes into a ceramic warming dish. For safety reasons (I don't like open flames in the house, especially for long periods of time) I used an electric warming element and hot air gun to melt the waxes together, mixing them to make a combined solution. Once mixed together and I was happy with the consistency, I placed the disc on a piece of parchment paper. I poured the wax mixture of the medallion. I used the hot air gun to ensure the wax covered evenly. I then waited about 15 minutes for the wax to cool and harden. Now that the wax was hard, I used a scribe knife to trace out the edge lines (around the leaf edge and outer circle). Afterwards I removed the wax from the areas I wanted to etch. I used a flat metal blade (which scratched the metal as you can see). As this area was going to be removed, I was not worried about the scratches. I also used a scribe to remove the lines inside of the leaves. Once complete, I cutout the paper around the medallion and placed it aside. I took a plastic container and mixed my etch solution. I as the water first, as the powers blend well this well. I stirred the solution until all of the copper sulfate and salt appeared dissolved. I then submerged the waxed medallion in the solution and set a timer for 10 minutes. After 10 minutes I removed the medallion, cleaned of the copper residue and returned it to the solution. I repeated this process 4 more times, for a total time of 50 minutes in the solution. NOTE: I did notice that some wax was still on the "cleaned" areas. I thought about ways to help here and came up with cleaning the wax between etchings. I tried it after a few times of submersion. Had I started from the beginning I think it would have been much cleaner. (EDIT: I did try this later on another piece and it did have a major affect. I will be doing it in the future.) After the etching I removed the piece from the solution and cleaned it with water and isopropyl alcohol. I removed the wax using the hot air gun, and thoroughly cleaned the disc again. I let it dry for about 15 minutes. Once dry, I use a watered down black paint (about 2 drops of water to 3 drops of paint) to create a base covering of the etched areas. This was to help the paint get into the crevices of the etching. I let it dry for about 5 minutes. I then applied the full strength black paint again. I used a paper towel to remove any residual paint on un-etched areas. Thus I had finished. A more Modern take As I stated above, I did redo this again using a Cricut and permanent vinyl. I still used my hand drawn image, tracing it with a black marker to help the lines stand out. I scanned it in. Using a pictue editor, I added a cleaner circle around the medallion, and a place to where I would drill for a necklace hole. I used the same etching solution measurements and time frame. Once complete, I painted it green, per the request of Mestre Roisin who requested the piece. I made 2 of these medallions in this fashion. (picture below)
0 Comments
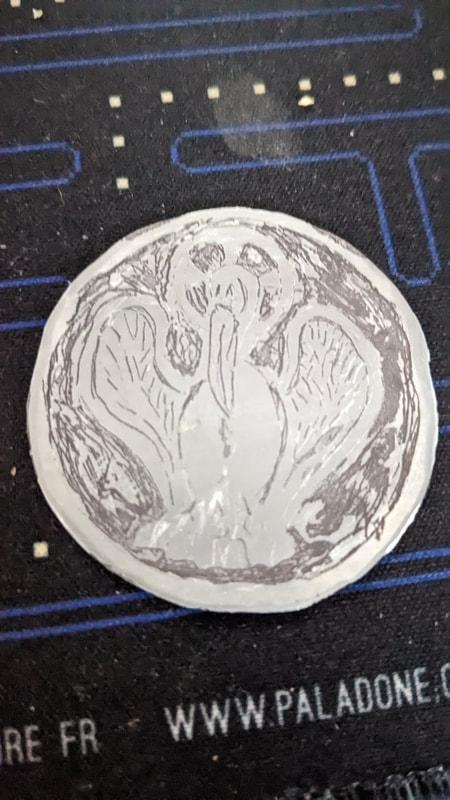
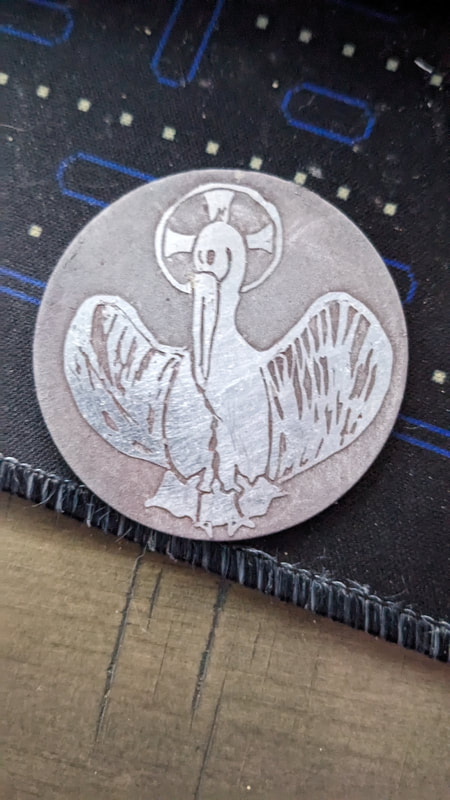
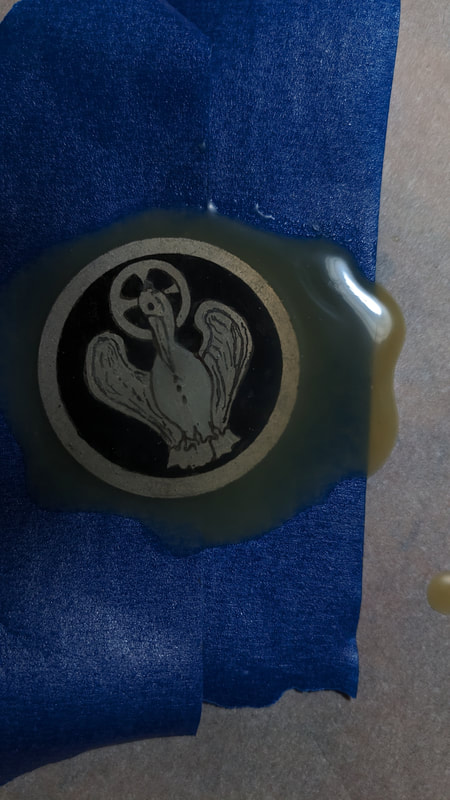
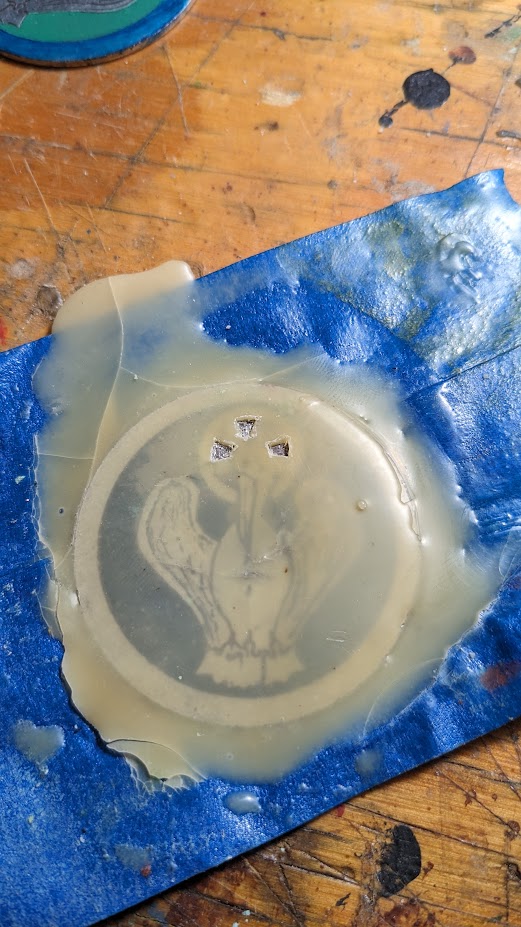
The first etching went very well, but I was not happy with the overall look. I thought it looked unfinished. My lady agreed with me. Actually she may have been the one to point it out, but I don't remember. I decided to add a ring around the edge to give it a little more styling. The next etch I was VERY happy with. And then...we (my lady and I) talked about coloring it and what that would look like. So I did more research into the coloring of Byzantine artwork and that's when I found out...the "cross" in the halo is only used for Christ in Byzantine artwork. My work was highly inaccurate. I was actually NOT disheartened because I had been theorizing I could re-etch something by covering it in wax and repeating the process. This was my chance! So I made a new batch of resist wax WITH rosin this time and began my work. It was here that I found just how much rosin helped the process. As you can see in the picture, I successfully removed the cross from the halo, albeit not completely, but my theory was proven true. It can be done. I also think I used a little too much rosin as I think there was a little bleed in the etching. Otherwise I am unsure what the color change in pars was. Happy with what I had learned, I actually decided to make a new medallion for a more uniform and clean etch overall. In the end, I repeated the entire process again, using the vinyl as the resist once again. I cleaned the medallion with isopropyl alcohol. and did not touch it again with my bare hands. I made a new batch of my wax mixture and used it seal the edges to prevent the back and sides from being etched. I submerged the piece for a total of 50 minutes, removing it to clean off the residue every 10 minutes. After the etch was complete, I cleaned it with water and isopropyl alcohol and put it aside. I then did some research into what paint are best with aluminum. After a time I decided I would use simple acrylic paints and then seal the medallion with multiple coats of spray sealer. This would help the paint last (hopefully) and prevent it from coming off in the future, protecting it from rubbing and weather. As a final note, something I learned as well. When using a Cricut vinyl, it is very difficult to get really detailed work. I could not get the feathers to really look like feathers. I experience the same with the wax. I think I see why artists in period used hashing to do a lot of their detail work. Yep, I have a lot more to learn here and I am looking forward to it.
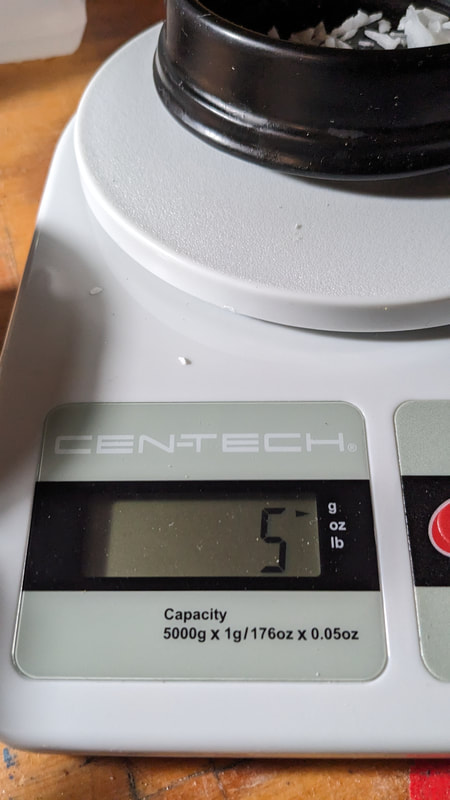
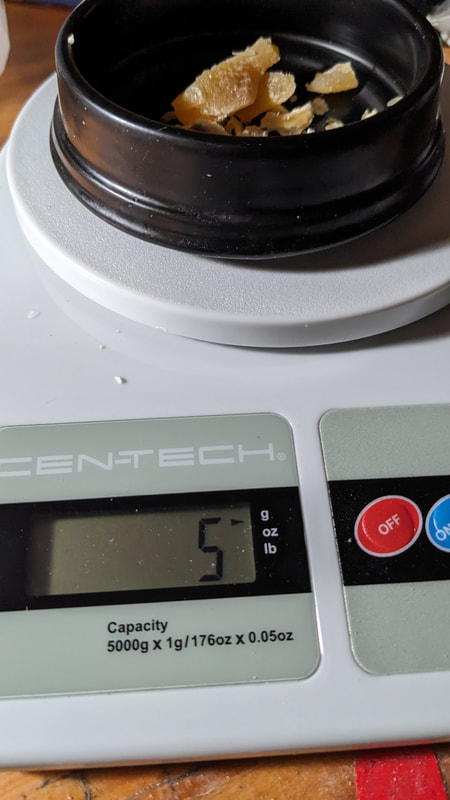
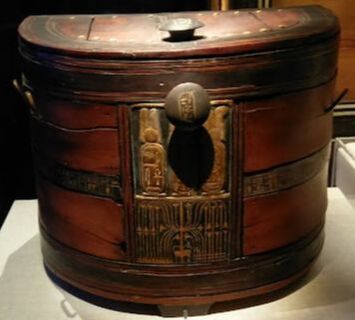
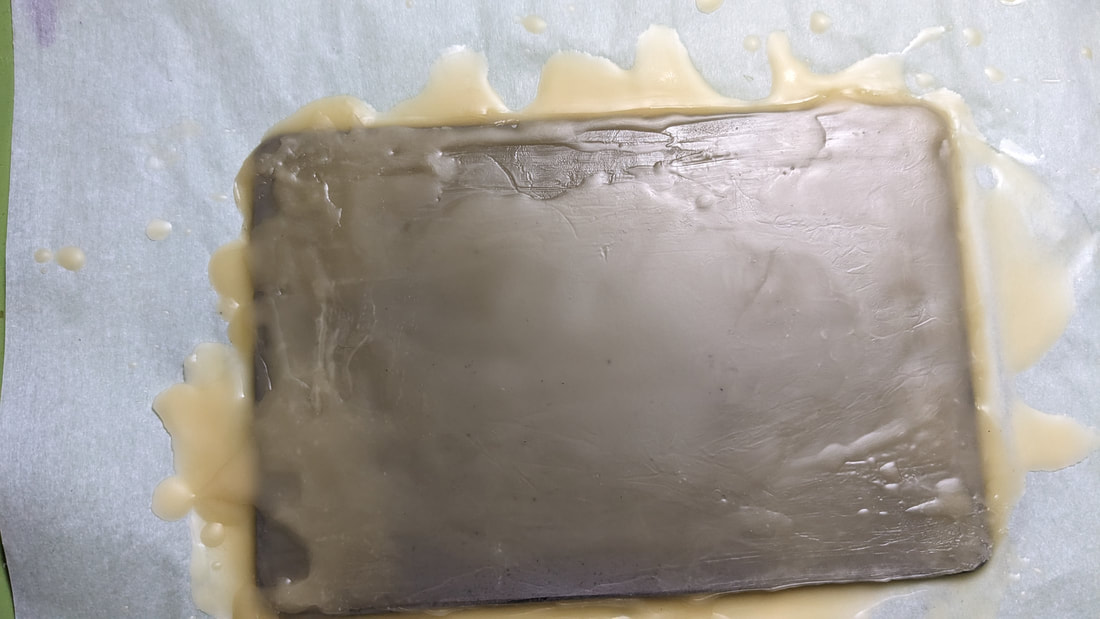
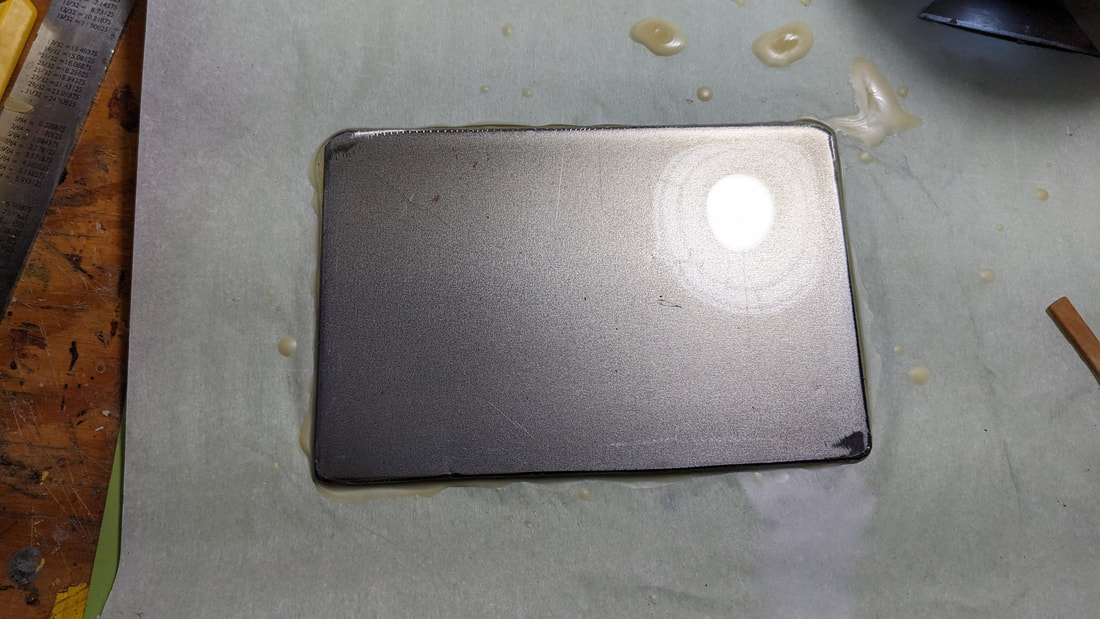
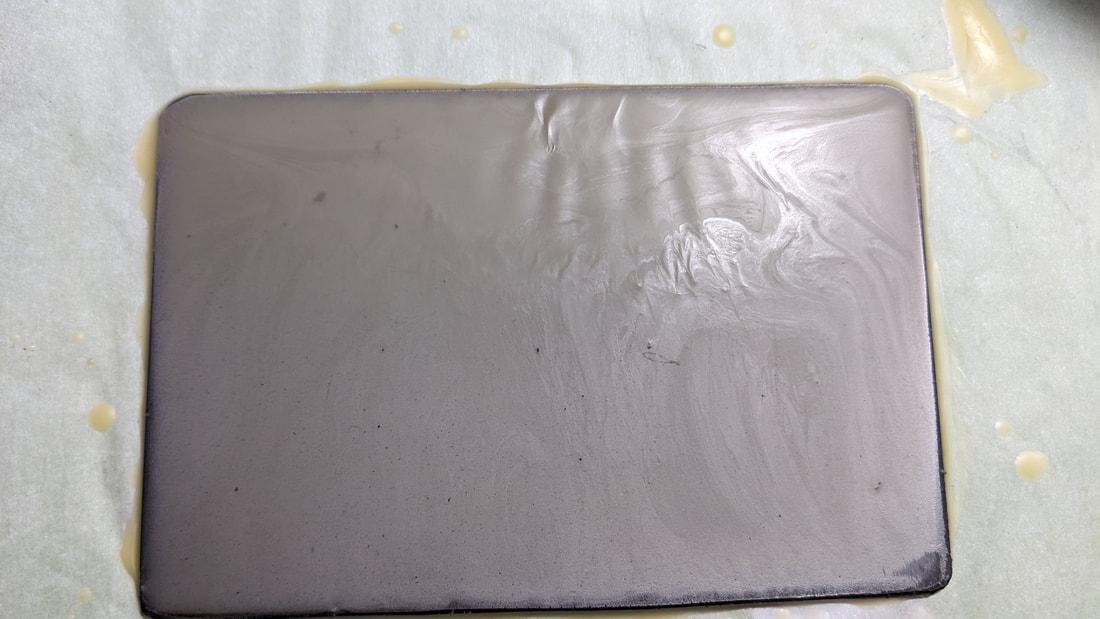
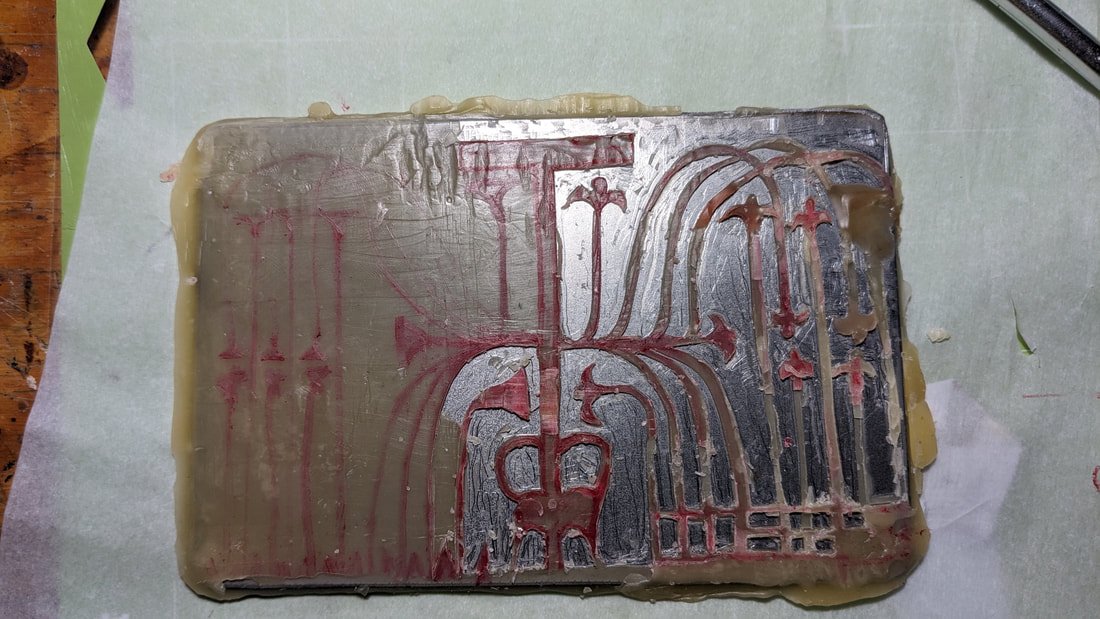
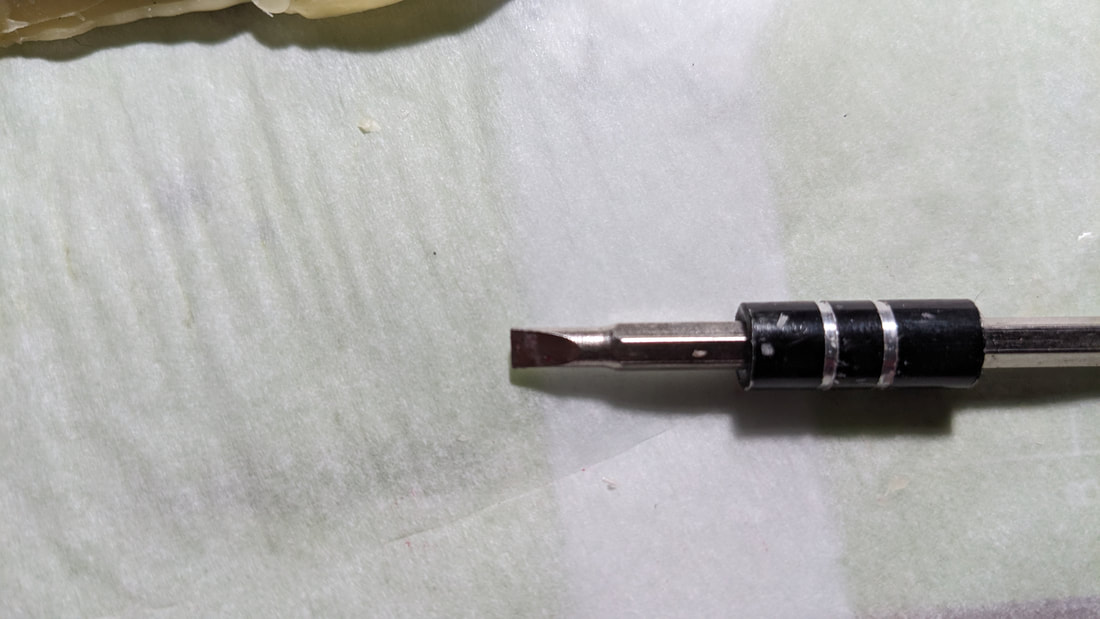
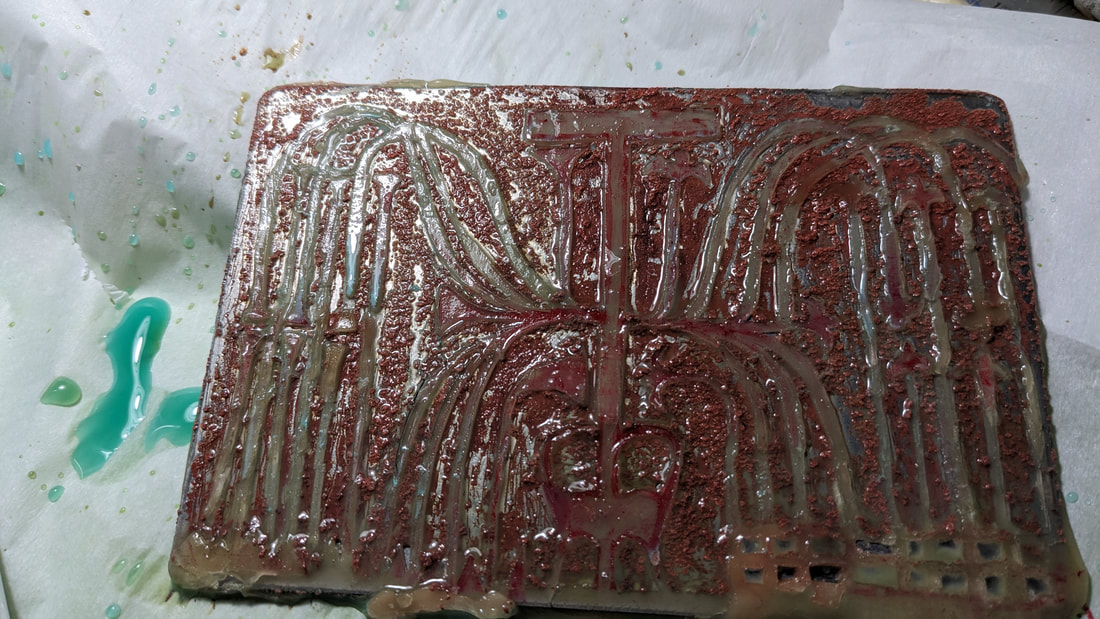
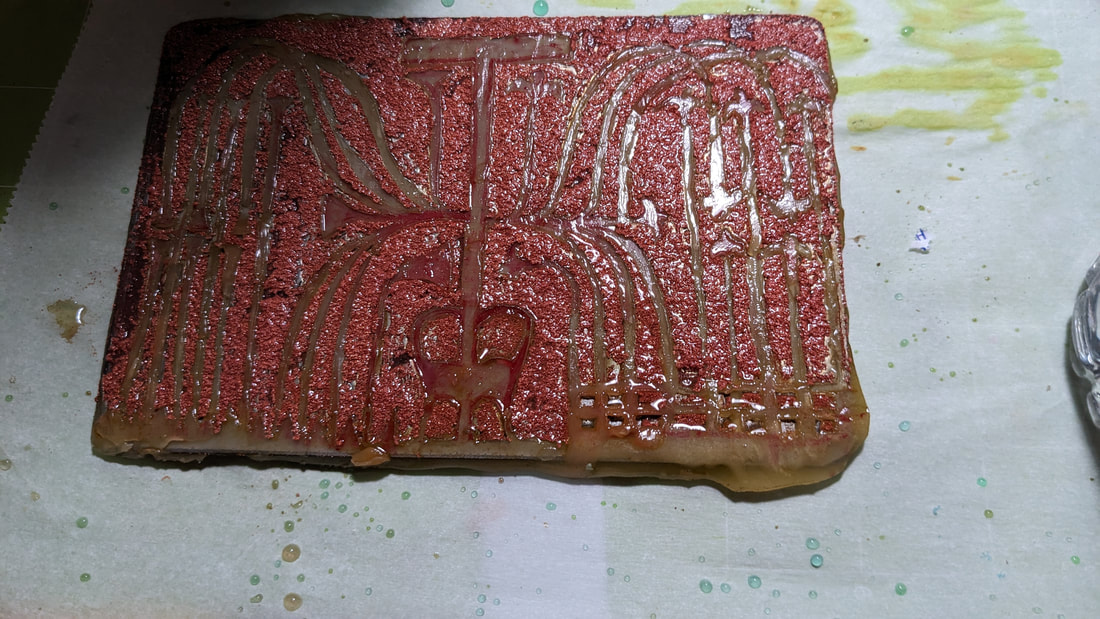
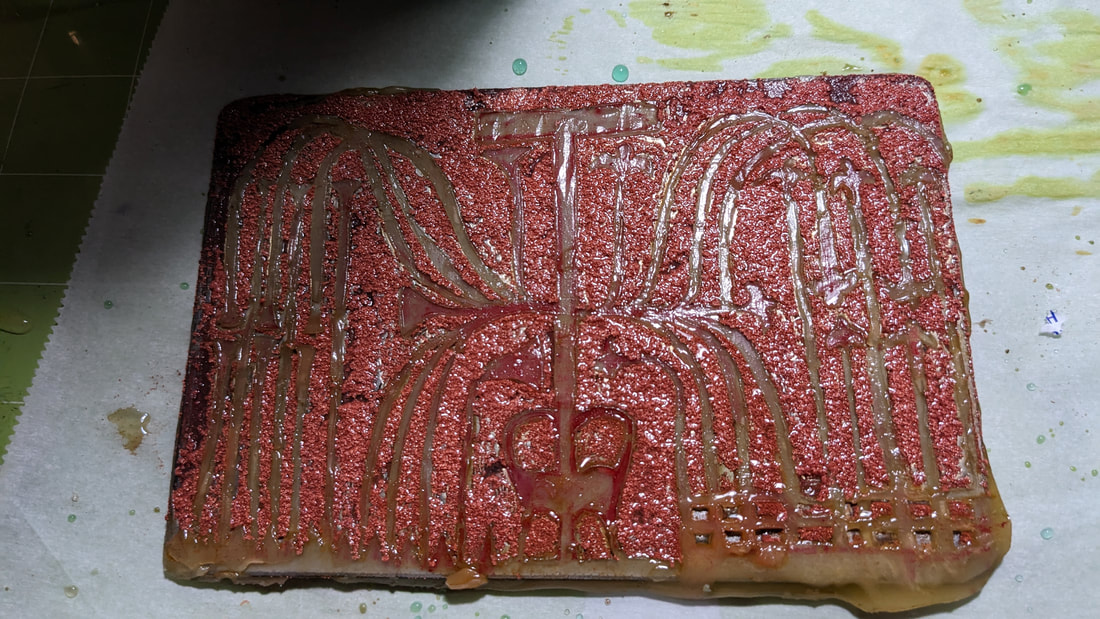
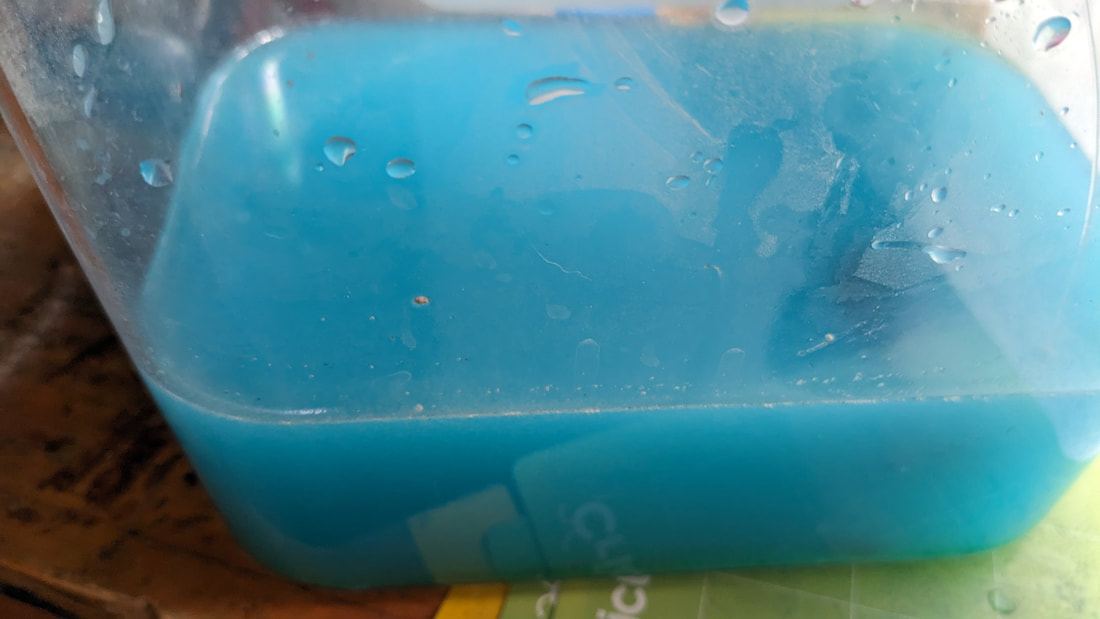
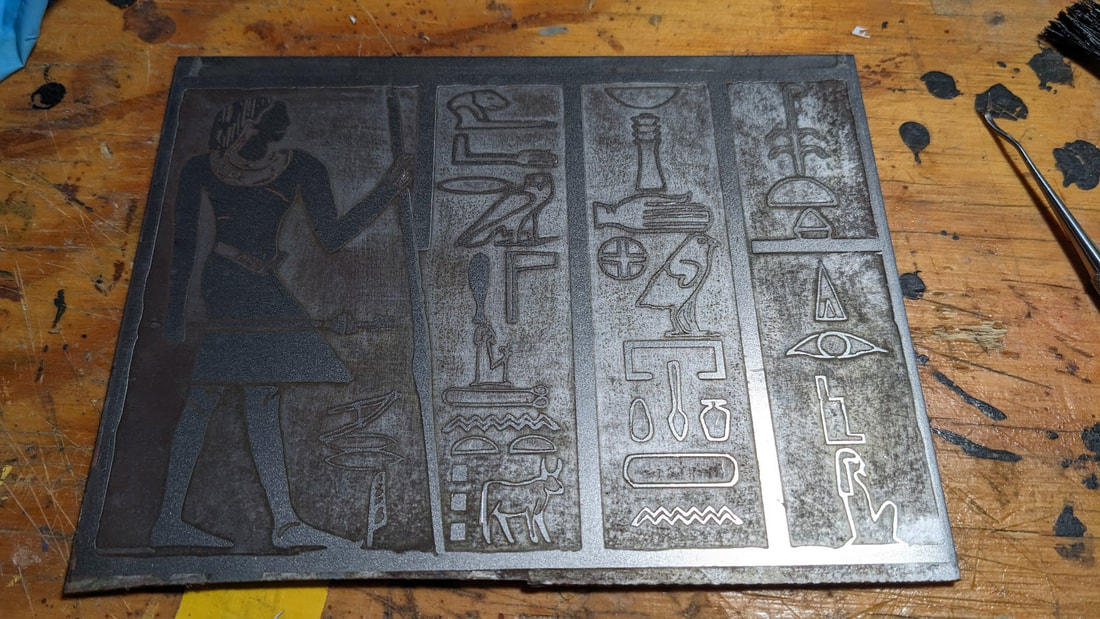
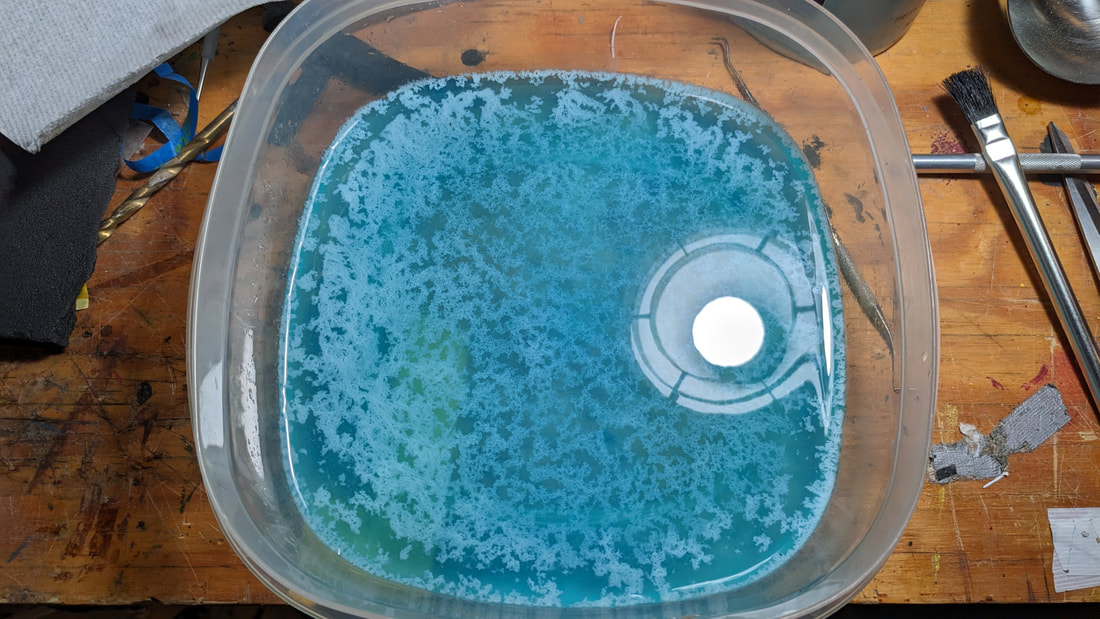
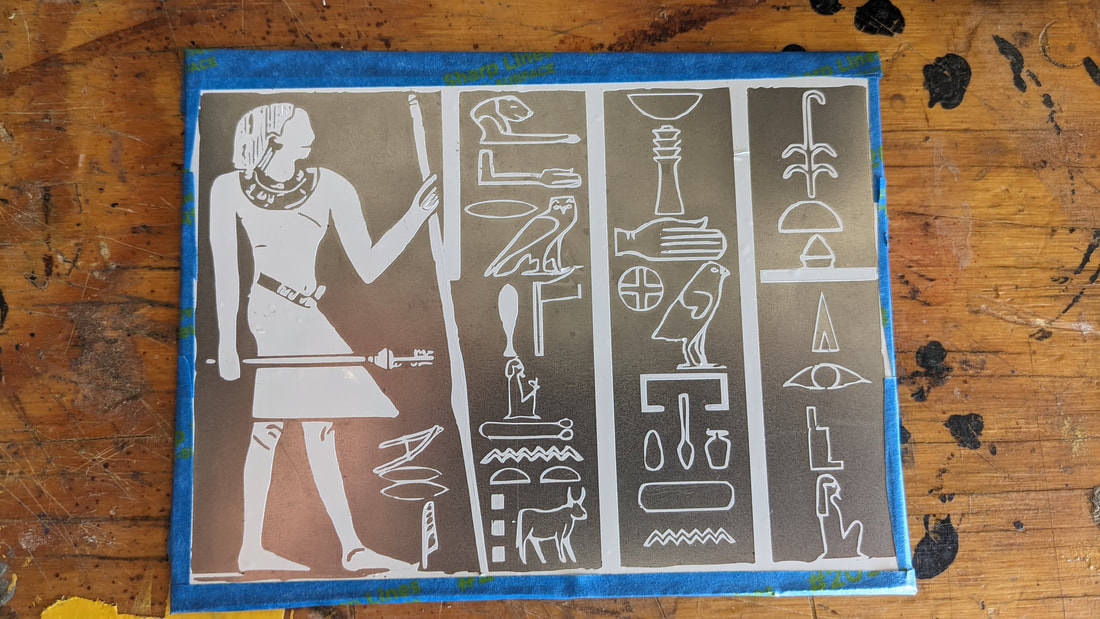
Why? I took up etching due to being inspiring at a Festival of the Rose by Snorri. I thought the idea was amazing and that led me to researching the period use of chemical and acid etching. I wanted to make an etched plate and combine it with my love of languages. SO my first had been the Hieroglyphs. This one was something from a Pharaohs tomb and I was using it to learn more form the process, building on what I had learned in my previous tries and after talking to Snorri about some changes to my process. Components 1 piece of Mild Steel 4 inches by 6 inches. 1 cup of Copper Sulfate 1 cup of Non-iodized Table Salt 4 cups of water ~4 Tablespoons of beeswax ~4 Tablespoons of Paraffin Isopropyl Alcohol Tools Hacksaw Metal grinder 2000 grit sandpaper Hot Air Gun Wood Burner with changeable tips Wax Warmer Sharpie Marker (Red) Craft knife (X-Acto knife) A micro-tool set with interchangeable small and micro flat head A plastic container to hold the solution and chemical Nitrile gloves Parchment Paper Course Brush The Process
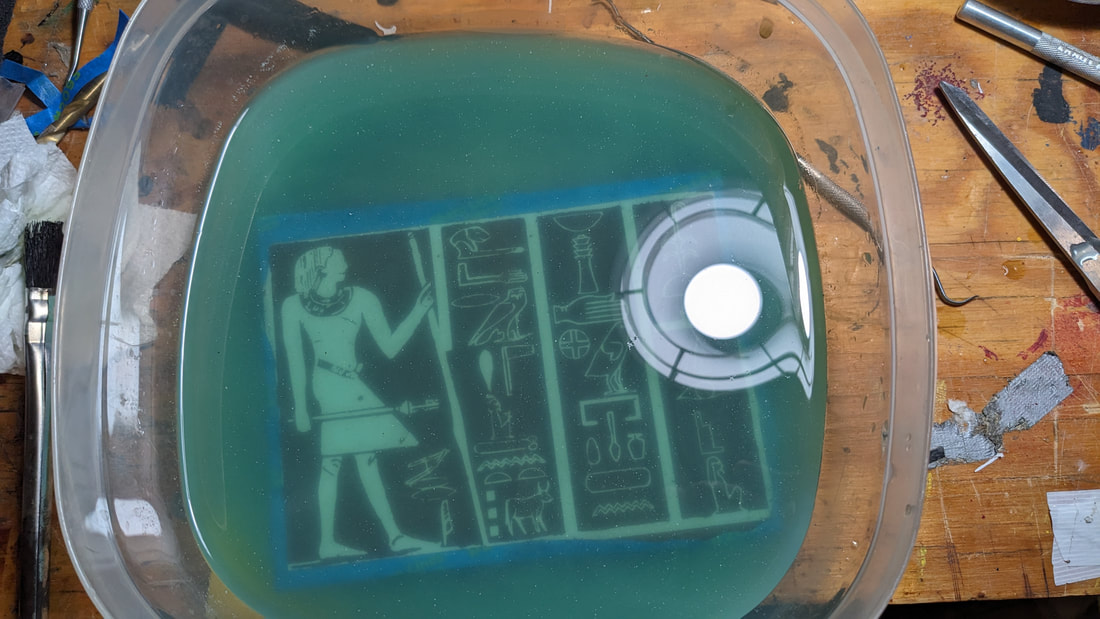
The Etching
The Result
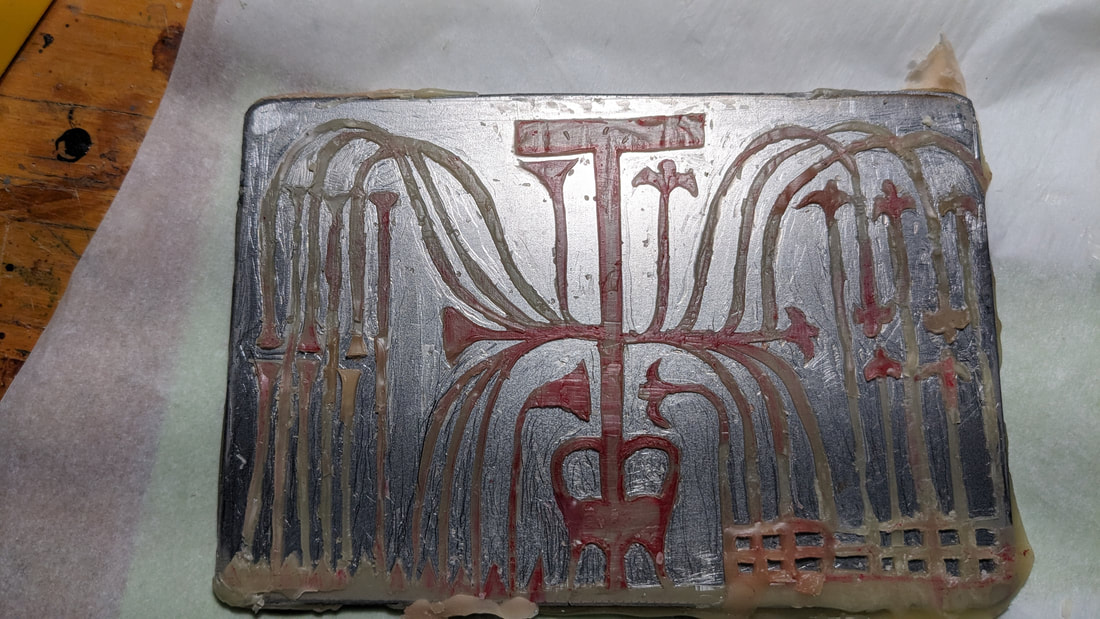
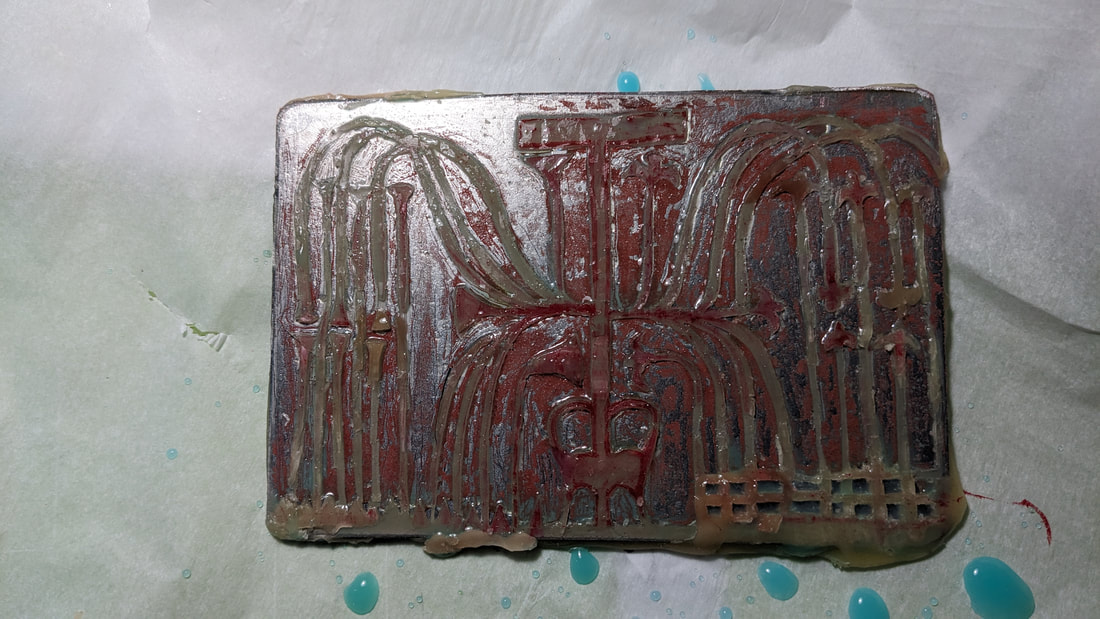
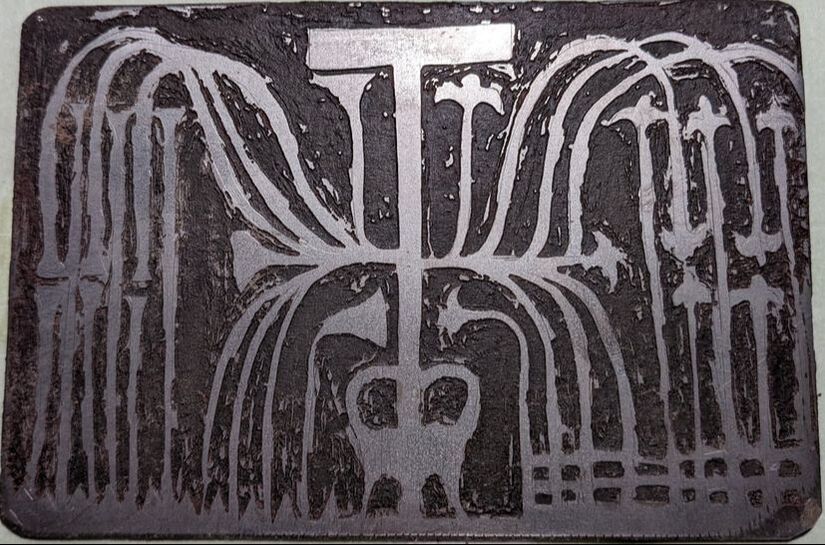
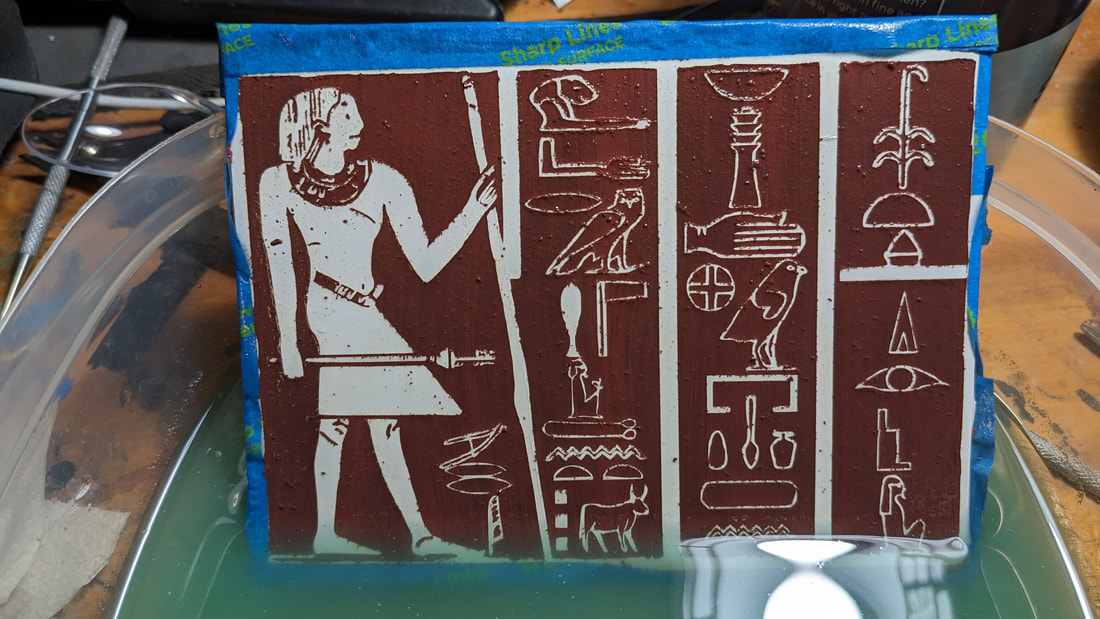
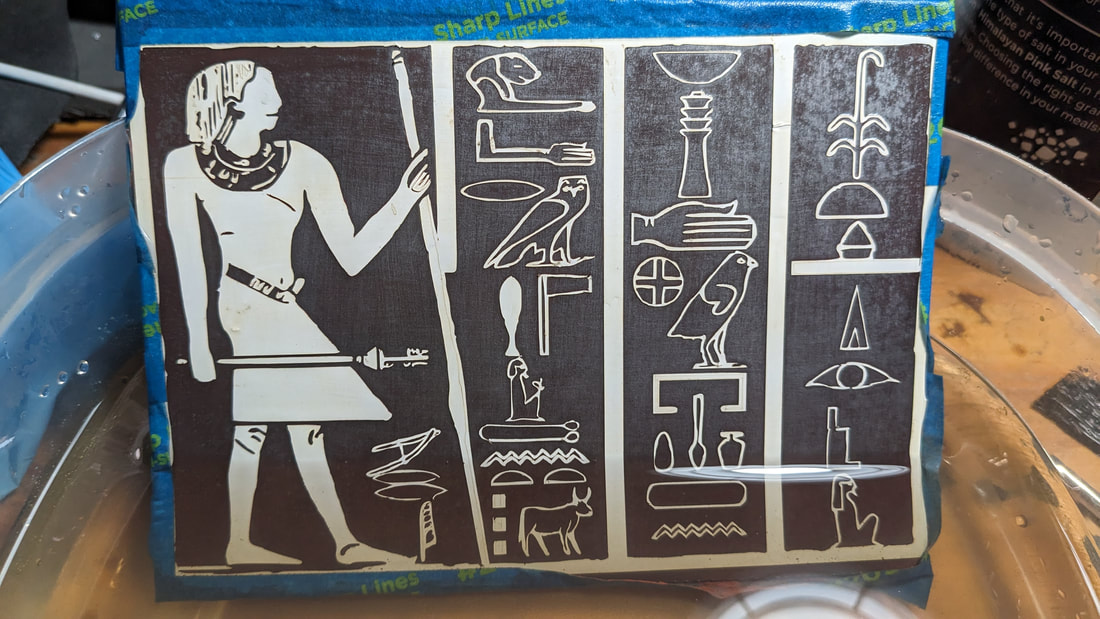
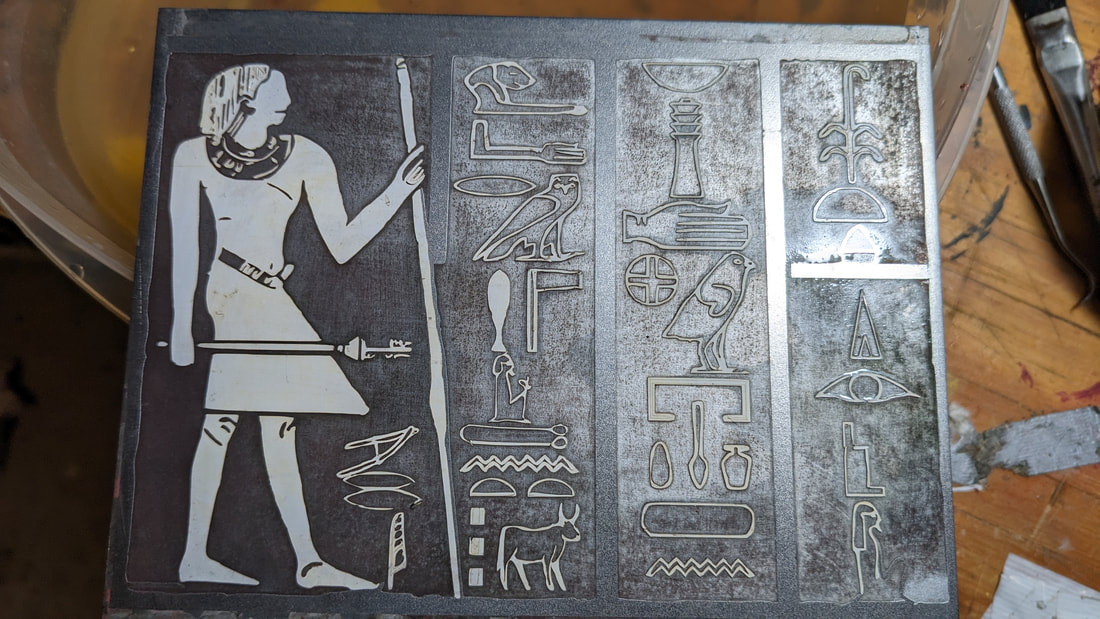
The final product had a very deep etch, much better than my first one a few months ago. As advised, I cleaned the plate and did a light buff with sandpaper to ensure that there was little to no impurities between the solution and the metal. The black parts in the image are where the solution etched the metal, removing it. You can obviously see where there was residual wax in those areas. Even though it was a really thin layer, it still prevented the etching process. Overall the etch was a big success. I wouldn't say that this was entry worthy into a competition, but I would say that the amount I learned from this is a big stepping stone in my process. Lesson Learned
1/13/2024 0 Comments First Chemical Etching (2023)
References Negre, X. (2024). Egyptian Hieroglyphs. Retrieved from Lexilogos: https://www.lexilogos.com/keyboard/hieroglyph.php# The Met. (n.d.). Inscribed Lintel from the Tomb of the Overseer of Priests and Keeper of the Sacred Cattle Mereri, Describing His Exemplary Life. Retrieved 2024, from Met Museum: https://www.metmuseum.org/art/collection/search/543995 |
Archives
May 2024
Categories |


 RSS Feed
